Showing posts with label DIY. Show all posts

Wednesday, July 10, 2013

Fashion: Two for One

Fashion, ootd


Between all the works shifts (where I get to wear the EVER fashionable Khaki shorts and navy blue t-shirt), and it being so deathly hot that I stick to jorts and plain tank tops so that I don't die (and so that all my sweat doesn't show up too bad) I hardly ever actually get 'Dressed'.  Over the past week though guys... I GOT DRESSED. TWICE. I mean, this is BIG, BIG stuff. I made a point to document each time, b/ yes it REALLY IS A BIG DEAL. and, well, b/c i havent done a 'fashion' post in a while...

LOOK ONE:
 photo IMG_1907_zps9b4bb096.jpg
 photo IMG_1900_zps5842ec09.jpg photo IMG_1892_zps0cf11c49.jpg
 photo IMG_1908_zps2cb57a8f.jpg photo 569356a0-751a-497f-a4ef-65dfe5ebf5a9_zpsf0edfa23.jpg
 photo IMG_1890_zpsf9ce2f5c.jpg photo IMG_1888_zps5995ecee.jpg
Dress: Forever21 (thrifted in  SF bay area for $5)
Sandals: Old Navy (from years ago)
Belt: (who knows? dump?)
Sunglasses: Wal-mart, $5.00
Sunglasses chain: Dollar store, bitches
Bow: ?

LOOK TWO:
 photo IMG_1872_zps852a0d82.jpg photo IMG_1829_zps3e62fa69.jpg
 photo IMG_1851_zps0a2042a7.jpg
 photo IMG_1816_zps9d138415.jpg photo IMG_1806_zps31cf5506.jpg
 photo IMG_1879_zpse5b234aa.jpg photo IMG_1882_zpsc7de4c3a.jpg
Dress (worn as shirt): Forever21 (bought at goodwill for $5.99)
Jean Skirt: DIYed from floor length, dump find
Belt: dump? Value village?
Sunglasses/chain: see above
Flip Flops: Rainbows I've had since high school, originally $40.00

Wednesday, August 8, 2012

DIY: Wall Art

DIY Wall Art

So, the other day I found this amazing painting at the Local Salvation Army.  Even the frame was bomb. SO, being the awesome Girlfriend I am, I decided Nick needed some new art work in his cabin (plus he needs MORE artwork in his cabin, b/c those walls are BARE. and Echo-y) 

DIY Wall Art


                   ***LOOK AT ALL THE DETAILS ON THIS BEAUTY!***
DIY Wall ArtDIY Wall Art

I decided upon an inside joke word that a friend has with Nick and I, and got to taping. Now, I forgot to take the image AFTER simply taping, but I simply cut/ripped Frog Painters tape to achieve the Block lettering you see below, and stick it directly to the canvas. 

Next I took some acrylic white paint, and a sponge brush and painted out the thinnest layer of white I could, so that you wouldn't totally lose the awesome picture int he background, but that so the AHOY in the middle would POP. 

If you find that you cant get the white thin enough to your liking, you can do as I did, and use a washcloth or rag and gently wipe over it before it is dry so that it spreads and thins out the paint even more.
AHOY

After the paint has dried, simply gingerly remove the painters tape from your canvas and expose the original painting underneath!

In person, i decided that the AHOY didn't pop enough on its own, so I outlined the letters in a gray sharpie, which sadly does not look great in the picture, but very much looks great in person. Believe me, i tired to take photo after photo to show this result....but, NOPE.
DIY Wall Art

So there you have it, a personalized CHEAP (the painting and frame cost me $2.00; every other supply I already had laying around my house)...so as i was saying, personalized and CHEAP piece of wall decor. Isn't Nick just the luckiest?

(Idea Sourced from A Beautiful Mess. Man, if Only it was an original thought....)

Tuesday, June 19, 2012

DIY: Girls Needs a Desk Chair

DIY Campy Attributes

I have been on a scramble for a desk chair for my new cabin, as my online productivity has been VERY low when all I can do it get cozy in bed with my laptop...which leads to me putting on Clone High, or catching up on some of my guilty pleasure television shows before falling asleep. Falling asleep does NOT equal new blog posts or Teal Tub Vintage updates, surprisingly.

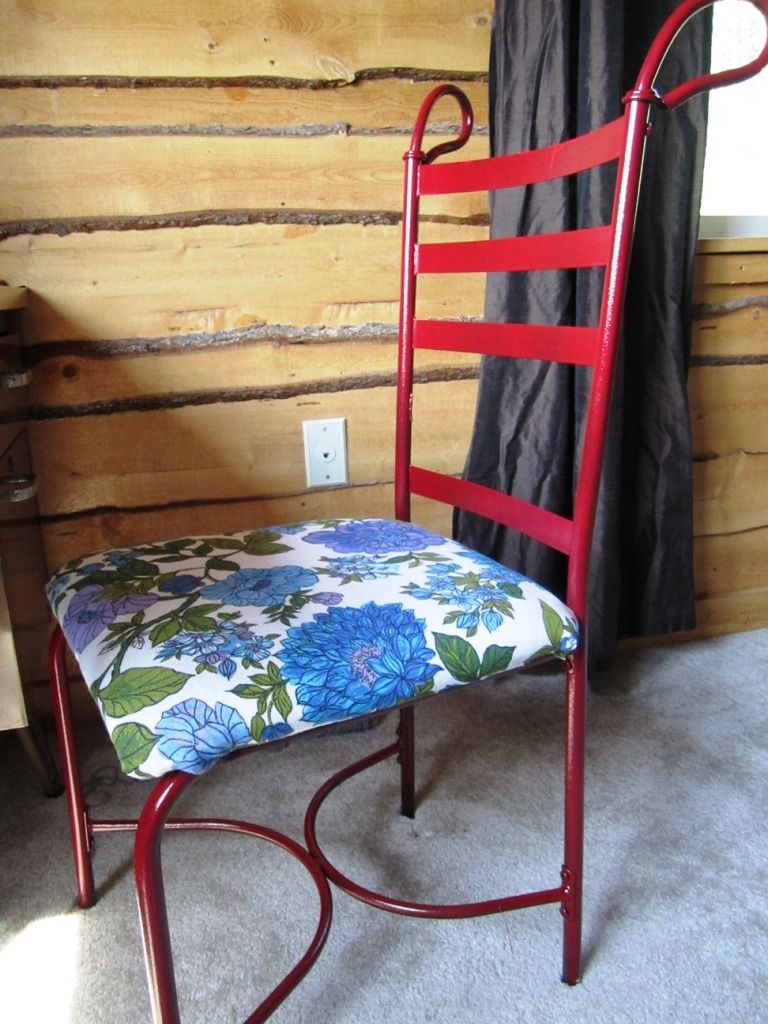
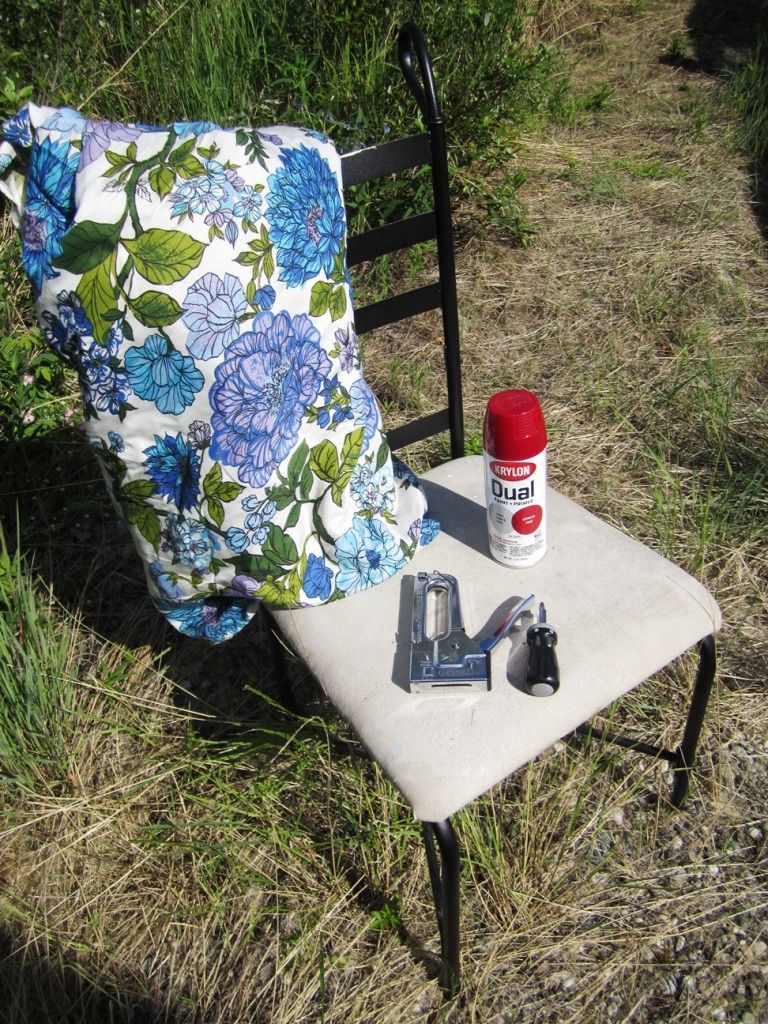
Well, the other day I cam across a simply metal chair at the Transfer site, and decided to make it mine. So here, I present, the simple transformation:
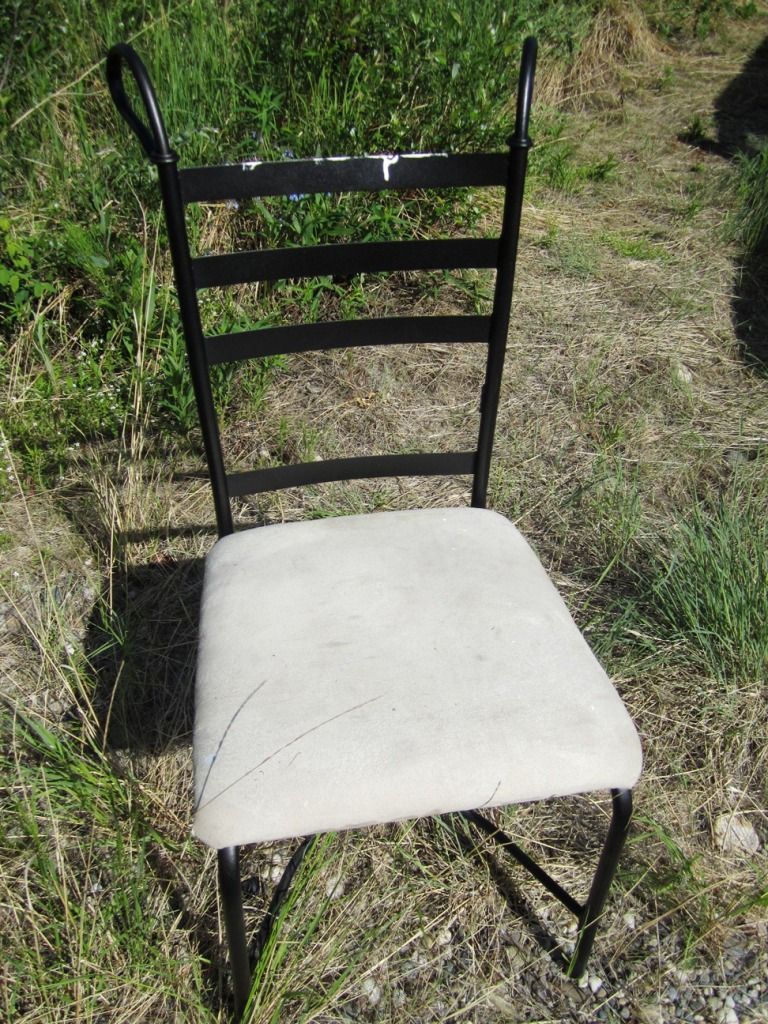
DIY BeforeDIY After
BEFORE and AFTER. (ohhhh, ahhhhhh)

DIY Refurbished Desk Chair
Supplies needed:
*Any old Chair that you can remove the cushion easily to reupholster
*Screwdriver
*Spray Paint
*Fabric of your liking
*Scissors
*Staple Gun

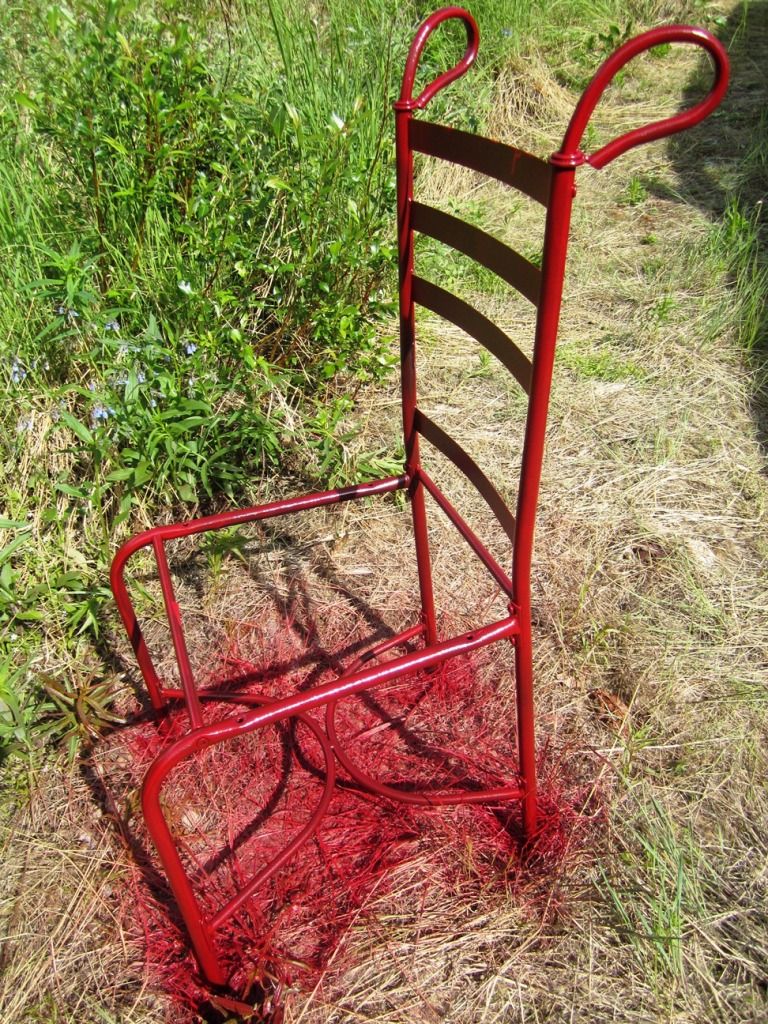
Alright. So Kids, this is an easy, easy upgrade. First, remove the chair seat from the actual metal Chair. It should be as simply as turning the chair over and removing screws from underneath. Set Chair seat/cushion aside, and move into the great outdoors, or a well ventilated area. now you are ready to spray paint!
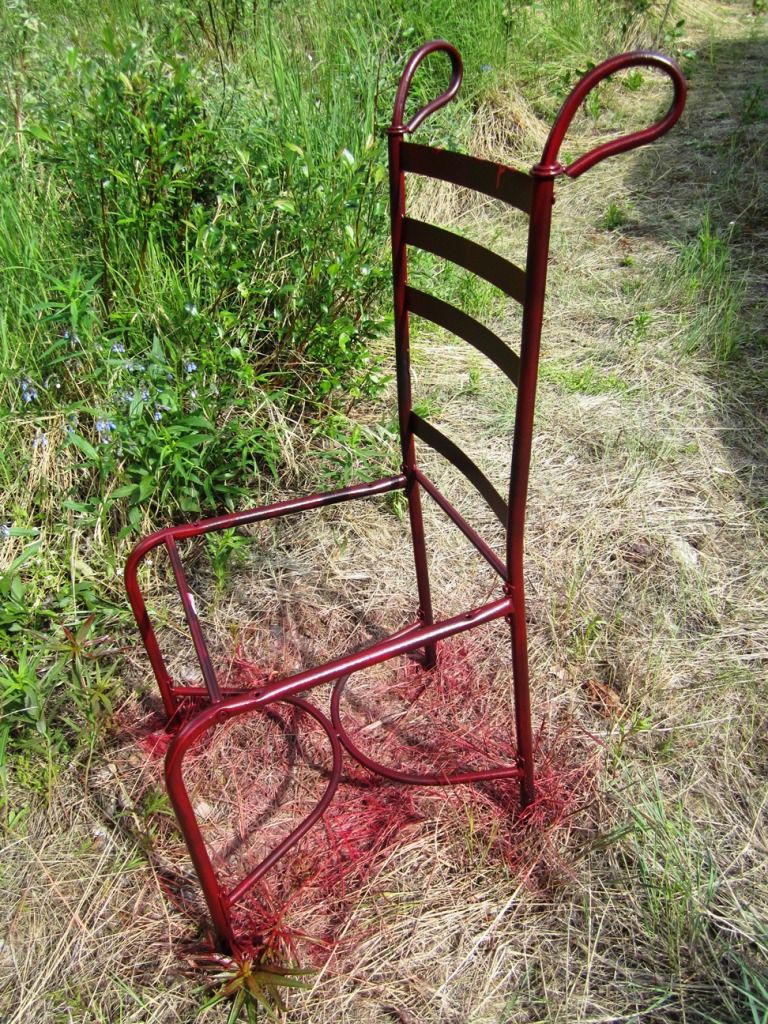
Coat OneCoat two
Coat One and Coat two. Let it be known, I am terrible at spray painting. My coats are never even, and I have lots of drip marks. Every time, without fail.

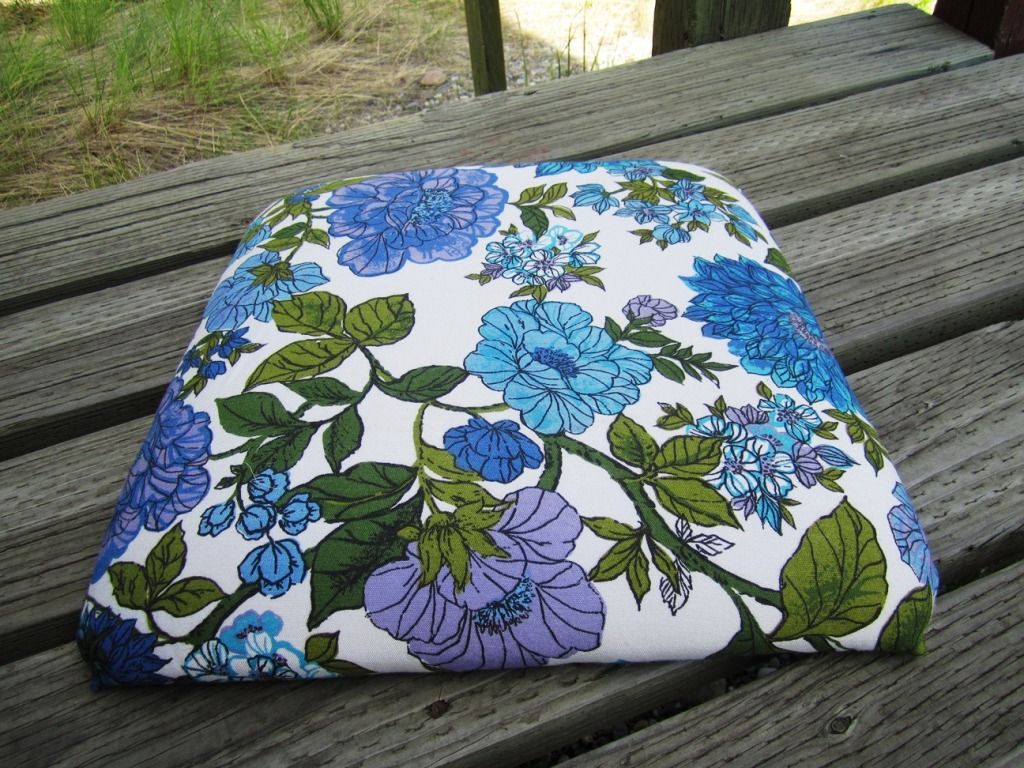
While Your spray paint is drying, and in between coats, you can move your focus back to your seat cushion. I am a fabric hoarder, and had this fabric laying around from when I Originally found it at the transfer site back last September. I simply spread the fabric out face down, placed my cushion down on top of it, also face down and simply cut out the shape of the cushion leaving about a 2-3 inch boarder. 

Now you can simply make your way around the cushion, pulling the fabric taunt, and stapling it to teh underside of the seat. (Staple gun. Best Purchase of... 2010? yeah. Best purchase, by FAR.)
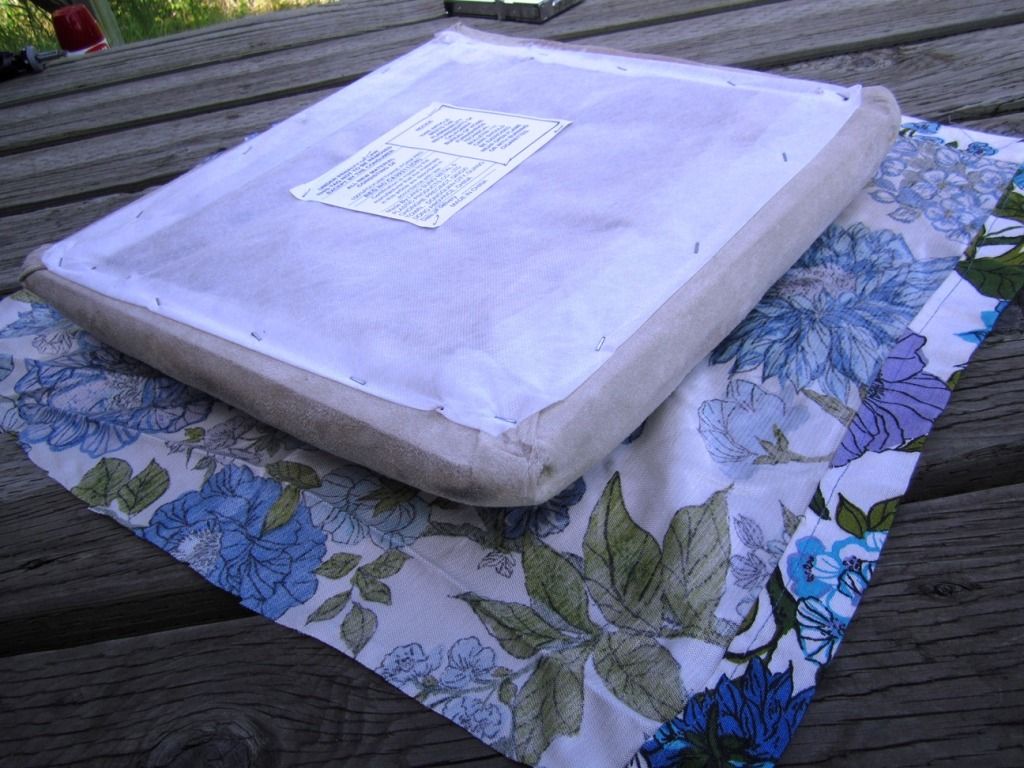
Seat Cover FabricTADA finished Product
Images help to explain where words can't. I am both terrible at using my words AND taking instructional photos...

Once you finish stapling, and your spray paint has dried adequately (now really, make sure to let it dry. No impatience here kids!) You can reattach the seat cushion to the main chair frame by simply using the same screws and holes that were already there. and TADA! Chair complete!
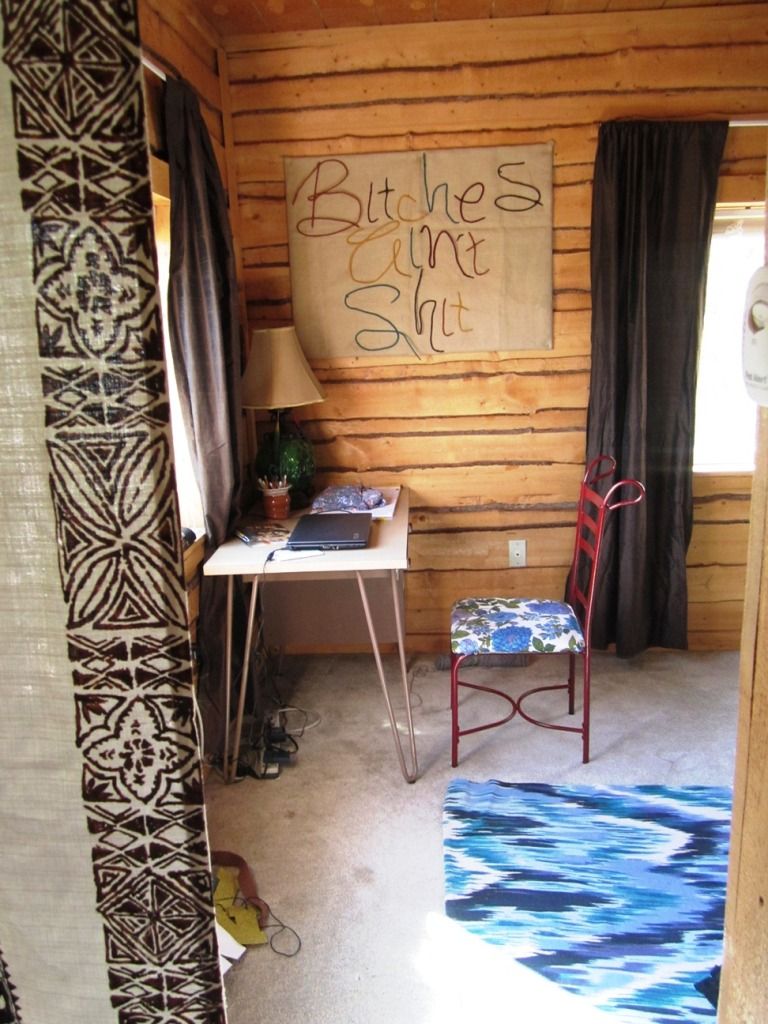
Bedroom Snapshot

This would be the chair in it's natural habitat, and I can say I am pretty happy with the results...next project? Tackle that desk you see there. I have lots of ideas folks, lots of ideas...

Sunday, April 29, 2012

A little bit O' Patchwork

DIY elbow patches

I love patchwork. Something about all the randomness of it....the colors, patterns, different fabrics... I just think it is great. I have a bit of a problem with collecting (AHEM Hoarding) scraps of fabrics I find at stores, the dump, etc. 
With my move back to Fairbanks coming up super soon, I have been trying to use a bunch of the fabric scraps in some sort of useful fashion so that I am not hauling trash bags of random scraps back with me.  Below a little showing of all the fabric scrap projects I have done over the last year, and am still currently working on.
Description of PhotoDescription of Photo
So I originally found this scrappy quilt at the dump, washed it, and have slowly added more random patches to it to keep it sewn together.  It is the centerpiece of my bedroom, and I cannot imagine a room of mine without it at this moment.
Description of PhotoDescription of Photo
This white dress is uber comfy, but the silhouette and style always seemed a bit on the fancier side to me. And I don't often have to wear anything even remotely fancy... so I decided to lighten it up (aka make it more everyday-able) with some fabric scrappy pockets. I already know i want to add MORE fabric to this dress...at the hem, or in the neckline, I just haven't decided exactly how yet...
Description of Photo
Description of Photo Description of Photo
This monstrosity is a very random patchwork blanket I am working on. obviously it will be rough, awkwardly sewn, and VERY ugly. All things that endear me to it Immediately. I am hoping to finish this in the next two weeks before I move!
Heart Elbow Patches
Description of PhotoDescription of Photo
Description of Photo
And finally, I decided to follow the trend of multiple tutorials I have seen online (one here at A Beautiful Mess) and give a plain grey jumper I have some sweet heart elbow patches. Once again, I think I may eventually add the same fabric to the from kangaroo pocket, but I wanted to test drive the patches first...

Friday, April 27, 2012

DIY: Foodie Edition!

DIY Recipes


              BAKED CREAM CHEESE WON-TONS!
I don't know about you, but I am a HUGE fan of the cheese won ton. HUGE FAN. I cannot enter a Chinese establishment without ordering cheese won tons. I get VERY upset if they are crab Rangoon, as I don't eat meat. I just want the CHEESE. So I decided it was time to try and make my own. I started out with a VERY basic recipe, just to make sure the general concept wasn't lost on me... recipe as follows:
Cream Cheese Won ton Recipe
Ingredients: 
2 tbsp sour cream
8 oz cream cheese
1 garlic clove, minced
1 tea. ginger puree (I used 2 tea. i like ginger...)
.5 tea soy sauce (I used 2 tea. i like soy...haha)
Wonton Wrappers
Olive Oil
Cream Cheese Wonton RecipeWonton Recipe
Simplest recipe ever. Preheat over to 415 degrees F. Step two? MIX EVERYTHING TOGETHER. (well... except the won-ton wrappers and olive oil). Put mixture in center of won-ton wrapper, wet edges and fold wrapper into triangle formation. Make sure to really push and seal edges together... I did not, and had a lot of seepage.  
Cheese WontonsCheese Wontons
Place Filled Won-Tons on foiled sheet, sprayed with some olive oil on top of won-tons so they get all golden-like, and bake for 12 minutes! TADA! Cheese Won-Tons! (side note: I used to buy stuff like Pam, etc. but then realized I could just buy a small squirt bottle...OR WATER GUN ....Oh man I just thought of that... anyway, small squirting bottle or gun, put olive oil in it, and BAM. tasty way to use oil without pouring loads!)


The fact that these are so easy makes me realize that I could put so many more things in them. Planned right now? Sunday im gonna do salmon ones for a party I am having. future? Mushrooms, scallions, cranberries, you can make them savory or sweet. SO MANY OPTIONS.

Sunday, March 11, 2012

Stationery 2.0

Campy Attributes DIY
DIY Stationary


I have a lot of scraps of things laying around my apartment; Scraps of fabric, yarn, paper, threads, every type of glue you can think of, photos, etc. When I received this bright set of stationery from my mom, I decided to put some of my scraps to use, and personalize the note-cards a bit!
DIY Stationary
Supplies: 
*A set of note cards/stationery (mine where a gift, thanks mom!)
*Scraps of fabric (I literally have  brown shopping bag full of scraps in bigger than a coaster. Most just in shreds....)
*Glue (I used tacky glue, but you can really use most types I would think)
*Scissors
*Bright colored or fun patterned paper (I actually used paint samples that I found at a large home supply store. They were too bright to pass up!)
*Embroidery thread and needles


Steps:
*Decide what image/shape you want to add to your note cards. I went with a 'K' for my name, and just free hand cut it out. I like things when they aren't uniform, so the differences of freehand didn't bother me. You could do initials, any shape, a silhouette, anything!
*I don't own a sewing machine, so I simply hand sewed all my 'K's to my note cards. I just did it at night while watching some TV with Nick, not time consuming at all!
*To spruce up the envelopes, I traced the shape of the inside flap onto one of my paint chips and used that as the template for all the rest of the envelopes
*After I simply glue the paint samples to the envelopes, making sure not to cover up the adhesive strip to seal the letter when finished!
DIY StationaryDIY Stationary
DIY Stationary


TADA! So Simple, and adds a little flare to generic stationery! What do you guys think!?